Product categories
News center
- Changzhou Wanhao Image Surveyor
- Measuring method for measuring a
- Complete list of maintenance fau
- Wanhao projector operation video
- Wanhao image measuring instrumen
- Operation Manual of Wanhao Image
- Wanhao projector instructions
- Official telephone number of Wan
- Official website of Wanhao Proje
- The processing method of jump nu
- Application of Wanhao image meas
- Domestic exhibitions in 2022 (as
- Explore the current situation of
- A brief analysis of the structur
- What is the function of the tool
- Precautions for use of measuring
Contact us
- Add: Jiangsu province Wuxi City New WU District
- Tel: 0510-81819749
- Fax: 0510-81819749-9
- Email: gc1718@163.com
Product Numbers:2013211155557
Price:
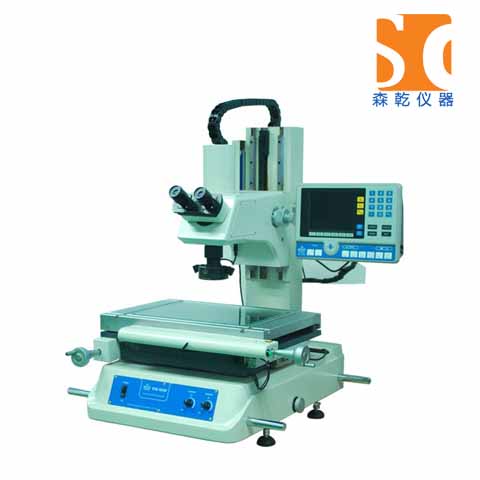
Product introduction:Video Toolmaker Microscope(Enhanced) VTM-2515F
Video Toolmaker Microscope(Enhanced)
Usage
Video toolmaker microscope is a photoelectric measuring system of high precision and efficiency. This video tool-maker Microscopeis widely used in different kinds of precision finishing industries,such as electronic part ,precision mold,spring, plastic,precision tool,rubber,oil seal valve , camear part ,pedal cycle part and PCB processing .This toolmaker Microscope is mainly applied in 2D measurement, sometime in 3D as well . With eyepiece gauge , This video tool-maker Microscopeis can also measure by comparing . This video tool-maker Microscopeis can measure the pitch and external diameter of the thread . This video tool-maker Microscopeis is a must for the metric room ,laboratory or workshop of various sectors concerning to machinery ,electronics, gauging instrument as well as academies, research institutions and measurement-inspecting department.
Specialities
Video toolmaker microscope has many functions such as displaying, magnifying, inputting and outputting, With color CCD camera (with C-mount interface), the microscope can input and output the data by connecting with the computer.This video tool-maker Microscopeis is very convenient for the user to measure with standard M2D-AT or QIM 3008 software.
Specification
| |
VTM-1510F |
VTM-2010F |
VTM-2515F |
VTM-3020F |
The metal table's size(mm) |
354*228 |
404*228 |
450*280 |
500*330 |
The glass table'size(mm) |
210*160 |
260*160 |
306*196 |
350*250 |
Travel(mm) |
150*100 |
200*100 |
250*150 |
300*200 |
Z-axis travel(mm) |
150 |
150 |
200 |
200 |
Resolution for X.Y.Z axis |
0.5μm |
0.5μm |
0.5μm |
0.5μm |
Weight(kg) |
100 |
110 |
135 |
140 |
Dimension(L*W*H)(mm) |
540*667*850 |
540*667*850 |
800*675*920 |
800*675*920 |
X.Y axis accuracy |
≤(3+L/75)(L is the lenghth of the work pieces to be measured,unit:mm) |
|||
Eyepiece |
||||
Lens magnification |
1X,3X(standard),5X |
|||
Eyepiece magnification |
10X(same for single and double eye piece)(option) |
|||
Total magnification |
10X--50X |
|||
Accuracy |
≤0.08% |
|||
Transmission illumination |
24V/20W Halogen lamp |
|||
Reflective illumination |
12v LED ring lamp and reflective illumination with laser point |
|||
Image system |
F-image system |
Imported 1/2"CCD Camera |
||
Software:M2D/QIM3008 |
||||


